Key Takeaways
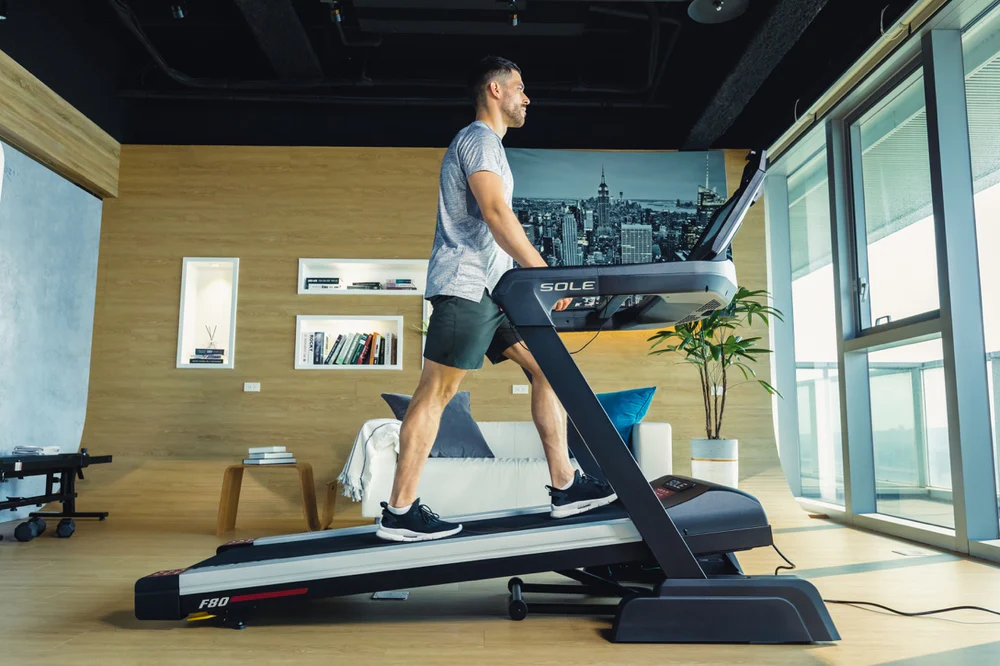
- The assembled SOLE F80 treadmill has a footprint of 82.5" L x 38" W x 66" H when unfolded.
- When folded, the dimensions are 44" L x 38" W x 71.5" H, saving significant space.
- Unboxing and assembly require basic tools such as an Allen wrench and a Phillips head screwdriver.
- Position the treadmill at least 3 feet away from any wall for optimal safety and functionality.
SOLE F80 Treadmill Dimensions
This treadmill is designed to offer a robust workout experience while being compact enough to fit into most spaces.
- Boxed Dimensions: 86" L x 39" W x 15" H
- Assembled Dimensions: 82.5" L x 38" W x 66" H
- Folded Dimensions: 44" L x 38" W x 71.5" H
- Step Up Height: 8"
- Weight Capacity: 350 lbs.
- Item Weight: 274 lbs.
- Boxed Weight: 322 lbs.
|
At SOLE Fitness, we're proud to offer the best treadmills for your home or gym. These machines are crafted to meet the highest standards of quality and performance, ensuring they are ideal for anyone - from fitness novices to seasoned athletes. Featured Product SOLE F80: Recognized for its high weight capacity and commercial-grade components, the F80 suits dedicated runners looking for a dependable treadmill with advanced features such as the 3.5HP motor. |
Necessary Space Before Setup
Before you start assembling the SOLE F80 treadmill, make sure you have enough space. This isn't just about the treadmill fitting in your room; you also need space to move around during the assembly process.
- Ensure the rear of the treadmill is at least 3 feet from any wall.
- Leave ample space on either side for safety and ease of access.
Boxed Dimensions
When you purchase a brand new F80 treadmill, it will be delivered to you in a box. The boxed dimensions are 86 inches in length, 39 inches in width, and 15 inches in height. Being aware of these dimensions allows you to prepare for delivery and make sure you have sufficient space to unpack the treadmill safely.
Assembled Dimensions
The footprint of the SOLE F80 treadmill when it is fully assembled and unfolded is 82.5 inches in length, 38 inches in width, and 66 inches in height. This gives you a good idea of the space you'll need to allocate in your room.
Folded Dimensions
One of the standout features of the SOLE F80 treadmill is its ability to fold up, which is perfect for saving space when the treadmill is not in use. When folded using the release lever mechanism, the dimensions are 44 inches in length, 38 inches in width, and 71.5 inches in height.

Weight Specifications
The SOLE F80 treadmill is built to be sturdy and durable, which means it has a significant weight. The treadmill itself weighs approximately 274 pounds while its weight limit is 350 pounds. Be prepared to have some help when moving it to its designated spot.
SOLE F80 Pre-Assembly Preparation
Unboxing Procedures
Make sure to do this in a spacious area where you can easily access all parts and components.
Start by carefully cutting open the box and removing the top packaging. Remove the plastic wrap and Styrofoam from beneath the unit. Do not remove the Velcro belt until you have removed the plastic wrap and Styrofoam.
Lay out all the components and check them against the instruction manual to ensure you have everything needed for assembly.
Required Tools
You'll need a few basic tools to assemble your SOLE F80 treadmill. These tools are often included in the package, but it's always good to have your own on hand just in case.
- Allen wrench
- Phillips head screwdriver
- Drill driver (optional but useful for faster assembly)

Positioning the Treadmill
Once you have all the parts laid out and the tools ready, the next step is to position the treadmill in its designated spot. Follow the spacing guidelines mentioned earlier to ensure optimal safety and functionality.
Position the treadmill so that the rear is at least 3 feet away from any wall. This will give you enough space to move around the treadmill during the assembly process and ensure that it operates smoothly once assembled.
As you position the treadmill, make sure it's on a smooth, level surface - you need the treadmill to remain stable during use to prevent any potential damage to the machine or your floor.
SOLE F80 Treadmill Assembly Guide
Frame Base and Upright Tubes
Start by assembling the frame base and upright tubes. These components form the foundation of your treadmill, so it's crucial to get this step right.
First, attach the upright tubes to the frame base using the provided bolts and Allen wrench. Make sure the bolts are tightened securely to ensure stability.
Installing Speed Nut Clips
Next, you'll need to install the speed nut clips. These clips help secure various parts of the treadmill together and are essential for the overall stability of the machine.
Place the speed nut clips in the designated slots on the upright tubes. Use a screwdriver to ensure they are firmly in place. Double-check that all clips are secure before moving on to the next step.

Attaching Frame Base Caps
Once the speed nut clips are installed, you can attach the frame base caps. These caps cover the bolts and clips, giving your treadmill a finished look and preventing any accidental injuries.
Align the frame base caps with the bolt holes and press them into place. You may need to use a bit of force to ensure they are securely attached.
Connecting Cables
With the frame and base assembled, it's time to connect the cables. This step is crucial for the treadmill's electronic functions, such as the display and controls.
Locate the cables coming from the console and the ones in the upright tubes. Carefully connect each cable according to the instruction manual. Make sure all connections are secure to prevent any issues during operation.
Attaching Console and Handrails
Now, attach the console and handrails to the treadmill. These components are essential for controlling the treadmill and providing support during your workouts.
First, align the console with the mounting points on the upright tubes. Use the provided bolts and an Allen wrench to secure the console in place. Then, attach the handrails to the sides of the console using the same method.
Final Assembly and AdjustmentsWith the main components in place, it's time for the final assembly and adjustments. This step ensures that everything is correctly aligned and functioning as it should.
Double-check all bolts and screws to make sure they are tightened securely. Adjust the treadmill belt if necessary, following the instructions in the manual. Ensure the belt is centered and moves smoothly.
Post-Assembly Tips
Congratulations, you've successfully assembled your SOLE F80 treadmill! But before you start using it, there are a few final checks and adjustments to make sure everything is in perfect working order.
Checking Connections
First, check all electrical connections to ensure they are secure. Loose connections can cause malfunctions or even damage the treadmill.
Turn on the treadmill and test the console functions. Make sure all buttons and features are working correctly.
Adjusting the Belt
Next, check the treadmill belt for proper alignment. A misaligned belt can cause uneven wear and affect your workout experience.
If the belt is off-center, use the adjustment bolts at the rear of the treadmill to center it. Turn the bolts clockwise or counterclockwise as needed to align the belt.
Testing the Treadmill
Finally, test the treadmill to ensure everything is functioning correctly. Start the treadmill at a low speed and gradually increase it to check for any issues.
Walk or run on the treadmill for a few minutes to make sure the belt moves smoothly and the machine feels stable. If everything checks out, you're ready to start your workouts!
As you position the treadmill, make sure it's on a smooth, level surface. This ensures that the treadmill remains stable during use and helps prevent any potential damage to the machine or your floor.
Final Thoughts on SOLE F80 Setup
To ensure a smooth assembly process, remember to:
- Prepare your space and tools before starting.
- Follow each step carefully and double-check connections.
- Test the treadmill thoroughly before beginning your workouts.
With these tips, you'll be well on your way to enjoying a robust and effective workout experience with your SOLE F80 treadmill.
Frequently Asked Questions (FAQ)
How much space do I need for the SOLE F80 treadmill?
When unfolded, the SOLE F80 treadmill requires a space of 82.5 inches in length, 38 inches in width, and 66 inches in height.
When folded, the dimensions are 44 inches in length, 38 inches in width, and 71.5 inches in height.
For safety, leave at least 3 feet of space behind the treadmill.
What tools are required for assembly?
The assembly process requires basic tools, which are included in the package:
- Allen wrench
- Phillips head screwdriver
- Drill driver (optional for faster assembly)
Can one person assemble the SOLE F80 treadmill alone?
Yes, but we recommend having an extra pair of hands to help, especially when moving and positioning the heavier components.
What should I do if my treadmill belt is off-center?
If the treadmill belt is off-center, use the adjustment bolts at the rear of the treadmill to realign it.
Turn the bolts clockwise or counterclockwise as needed until the belt is centered and moves smoothly.
Is there a warranty for parts and labor?
Yes, the SOLE F80 treadmill comes with a comprehensive warranty that covers parts and labor. Be sure to register your product and check the specific terms of the warranty for detailed information.
- Frame & Motor: Lifetime
- Deck, Parts & Wear Items: 3 Years
- Labor: 1 Year
- Cosmetic Items: 90 Days


Leave a comment
This site is protected by hCaptcha and the hCaptcha Privacy Policy and Terms of Service apply.